-
×
 BOYA BY WM4 PRO K3 2.4GHz WIRELESS MICROPHONE SYSTEM
1 × 49.900 OMR
BOYA BY WM4 PRO K3 2.4GHz WIRELESS MICROPHONE SYSTEM
1 × 49.900 OMR -
×
 BOYA LAVALIER MICROPHONE BY M40D
2 × 20.000 OMR
BOYA LAVALIER MICROPHONE BY M40D
2 × 20.000 OMR
المجموع: 89.900 OMR
SKU: 0141005000075
متوفر في المخزون
13.000 OMR
متوفر في المخزون
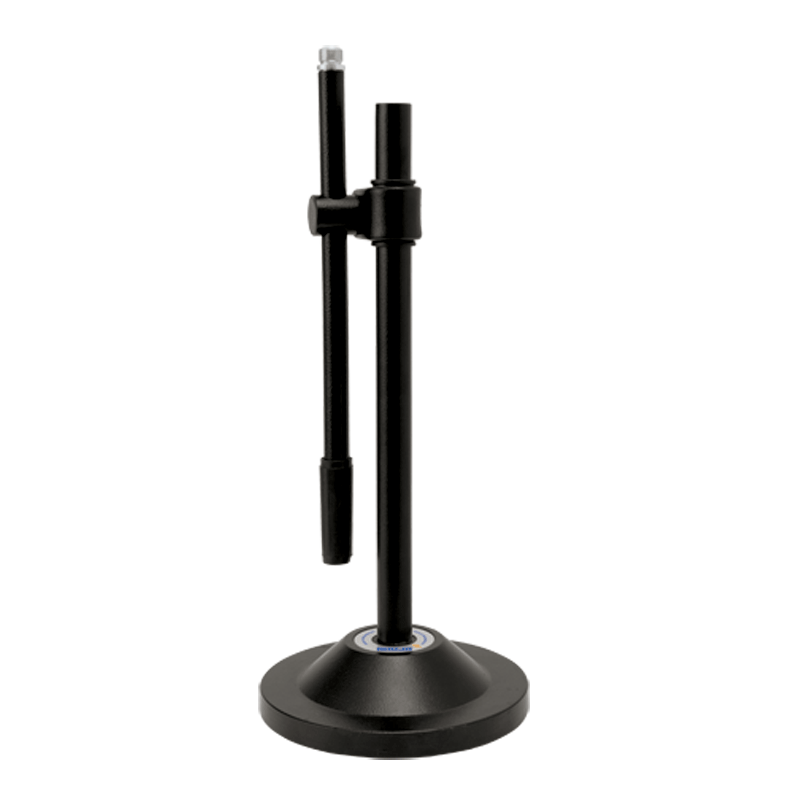
Step 1: Unboxing – Gently remove all components of the Ahuja ATS200 microphone stand from the packaging, ensuring you have the base, adjustable rod, microphone holder, and any accompanying screws or attachments.
Step 2: Base Assembly – Place the sturdy base of the microphone stand on a flat and stable surface. Ensure it sits securely to provide a stable foundation for the stand.
Step 3: Adjust Height – Extend the adjustable rod to your preferred height by loosening the tightening mechanism located on the side of the stand. Adjust the height to suit your needs, whether you’re standing or sitting during use.
Step 4: Attach Microphone Holder – Depending on the design of the microphone holder provided, either screw or snap it onto the top of the adjustable rod. Ensure it is firmly attached and positioned correctly to securely hold your microphone.
Step 5: Secure Microphone – Carefully place your microphone into the holder, ensuring it is positioned correctly and securely held in place. Adjust any angle or tilt settings on the microphone holder as needed to achieve the desired microphone position for optimal performance.
Once assembled, your Ahuja ATS200 microphone stand is ready to be used for recording, broadcasting, or live performances. Always double-check the stability and adjustability of the stand before use, and handle both the microphone and stand with care to prevent any damage.
*Gold-sputtered diaphragm *broadcast quality condenser microphone *cardioid omnidirectional and bidirectional polar patterns *wide frequency range and ultra low noise *off-axis rejection for clean recordings controlled by low-cut filter switch *all-metel housing * 3m(10ft)XLR cable included *0dB,-10dB pad switch
 أقل سعر
 الخدمة والإصلاح
 أحدث
أحدث

لا توجد مراجعات حتى الآن.