1. **Unboxing**: Open the packaging of the Coopic SU 101 Lighting Kit Studio and carefully remove all components, including light stands, light bulbs, softboxes, and any other included accessories.
2. **Assembly**: Begin by setting up the light stands. Extend the legs and adjust the height of each stand to your desired level, ensuring stability on a flat surface. Attach the softboxes to the stands according to the provided instructions, typically by inserting the metal rods into the designated slots.
3. **Mounting Lights**: Screw the light bulbs into the sockets located within the softboxes. Ensure they are securely tightened to prevent any accidental loosening during use. Position the softboxes facing your subject or scene, angling them as needed for optimal lighting.
4. **Power Connection**: Plug the power cords of the softboxes into a nearby power outlet. Make sure the cords are untangled and not stretched to prevent any damage. Check that the power switch on each softbox is in the “Off” position before connecting to power.
5. **Adjusting Light Intensity**: Turn on the power switches of the softboxes to activate the lights. Depending on the model, you may have options to adjust the brightness levels using built-in dimmer switches or external controls. Experiment with different settings to achieve the desired lighting effect for your photography or videography needs.
Following these steps will help you set up and utilize the Coopic SU 101 Lighting Kit Studio effectively, providing professional lighting solutions for your studio or creative projects.
Cpt Guitar 3713c
Go Pro Max 2 360 Action Camera With Memory Card CHDSZ-311-RT
SONY PS4 UFC 4 GAME CD
Insta 360 Action Camera Ace Pro Black
GameSir F5 Falcon Mini Mobile Gaming Controller
Coteetci Cellphone Game Joystick
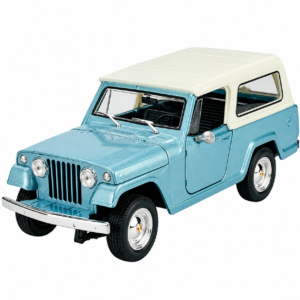
Welly Metal Car Jeep Jeepster Commando Station Wagon Size 1.24 WL-24117H-W
Bm 13k Bee Melodica
New Arrivals
Offers
Service & Repair


There are no reviews yet.