1. **Identify the Connector**: Locate the Neutrik NP3X Connector. It typically has a cylindrical metal body with a threaded section at one end and a slot for the cable at the other end.
2. **Prepare the Cable**: Strip the outer insulation of the audio cable to expose the inner wires. Ensure that you strip just enough insulation to reveal the required length of wires for proper connection.
3. **Prepare the Wires**: If the cable has multiple wires, such as a stereo audio cable, separate and strip each wire individually. You may need to use wire strippers to do this accurately.
4. **Identify the Terminals**: The Neutrik NP3X Connector usually has three terminals: Tip (T), Ring (R), and Sleeve (S). These terminals correspond to the different sections of the TRS (Tip-Ring-Sleeve) connector.
5. **Solder the Wires**: Tin the exposed wires by applying solder to them. Then, solder each wire to its respective terminal on the NP3X Connector. Typically, the tip wire goes to the T terminal, the ring wire to the R terminal, and the sleeve wire to the S terminal.
6. **Check Connections**: After soldering, double-check each connection to ensure there are no loose wires or solder joints. A good connection is essential for reliable audio transmission.
7. **Secure the Cable**: Once all wires are securely soldered, carefully insert the cable into the connector’s body, ensuring that the wires go into the correct sections and terminals.
8. **Assemble the Connector**: Screw the threaded section of the connector onto the body to secure the cable in place. Tighten it firmly but avoid over-tightening, as this could damage the connector or cable.
9. **Test the Connection**: Plug the Neutrik NP3X Connector into the appropriate jack on your audio equipment and test the connection. Ensure that audio signals are transmitted properly and that there are no issues with connectivity or sound quality.
10. **Maintenance**: Periodically inspect the connector for any signs of wear or damage, and clean it if necessary. Proper maintenance ensures the longevity and reliability of the Neutrik NP3X Connector.
Following these steps will allow you to effectively use the Neutrik NP3X Connector for secure and reliable audio connections in various professional audio setups.
Here’s a step-by-step description for using the Neutrik NP3X Connector:
1. **Identify the Connector**: Locate the Neutrik NP3X Connector. It typically has a cylindrical metal body with a threaded section at one end and a slot for the cable at the other end.
2. **Prepare the Cable**: Strip the outer insulation of the audio cable to expose the inner wires. Ensure that you strip just enough insulation to reveal the required length of wires for proper connection.
3. **Prepare the Wires**: If the cable has multiple wires, such as a stereo audio cable, separate and strip each wire individually. You may need to use wire strippers to do this accurately.
4. **Identify the Terminals**: The Neutrik NP3X Connector usually has three terminals: Tip (T), Ring (R), and Sleeve (S). These terminals correspond to the different sections of the TRS (Tip-Ring-Sleeve) connector.
5. **Solder the Wires**: Tin the exposed wires by applying solder to them. Then, solder each wire to its respective terminal on the NP3X Connector. Typically, the tip wire goes to the T terminal, the ring wire to the R terminal, and the sleeve wire to the S terminal.
6. **Check Connections**: After soldering, double-check each connection to ensure there are no loose wires or solder joints. A good connection is essential for reliable audio transmission.
7. **Secure the Cable**: Once all wires are securely soldered, carefully insert the cable into the connector’s body, ensuring that the wires go into the correct sections and terminals.
8. **Assemble the Connector**: Screw the threaded section of the connector onto the body to secure the cable in place. Tighten it firmly but avoid over-tightening, as this could damage the connector or cable.
9. **Test the Connection**: Plug the Neutrik NP3X Connector into the appropriate jack on your audio equipment and test the connection. Ensure that audio signals are transmitted properly and that there are no issues with connectivity or sound quality.
10. **Maintenance**: Periodically inspect the connector for any signs of wear or damage, and clean it if necessary. Proper maintenance ensures the longevity and reliability of the Neutrik NP3X Connector.
Following these steps will allow you to effectively use the Neutrik NP3X Connector for secure and reliable audio connections in various professional audio setups.
 Earldom Data Cable 2.4A to Usb C EC 187C 1 Meter
1 × 1.000 OMR
Earldom Data Cable 2.4A to Usb C EC 187C 1 Meter
1 × 1.000 OMR 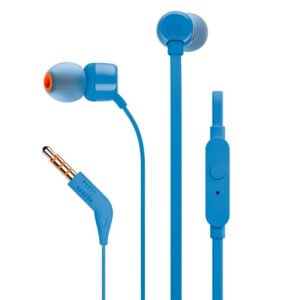 سماعة في الأذن تيون من جيه بي ال
1 × 2.500 OMR
سماعة في الأذن تيون من جيه بي ال
1 × 2.500 OMR  BOYA LARGER DIAPHRAGM CONDENSER MICROPHONE BY M1000
2 × 38.800 OMR
BOYA LARGER DIAPHRAGM CONDENSER MICROPHONE BY M1000
2 × 38.800 OMR  BOYA LAVALIER MICROPHONE BY M40D
1 × 20.000 OMR
BOYA LAVALIER MICROPHONE BY M40D
1 × 20.000 OMR  Cleo-SFO Ladies Massager Belt NGB716
1 × 3.800 OMR
Cleo-SFO Ladies Massager Belt NGB716
1 × 3.800 OMR  BOYA WIRELESS MICROPHONE BY WM4 PRO
1 × 47.900 OMR
BOYA WIRELESS MICROPHONE BY WM4 PRO
1 × 47.900 OMR  Haino Teko Smart Watch RW 78
1 × 12.900 OMR
Haino Teko Smart Watch RW 78
1 × 12.900 OMR  Cleo-TY Kids Scooter HB 919-E1
1 × 26.900 OMR
Cleo-TY Kids Scooter HB 919-E1
1 × 26.900 OMR  Cleo-TY Smart Robot
1 × 13.800 OMR
Cleo-TY Smart Robot
1 × 13.800 OMR  Earldom Microphone Collar Clip MC16L 2in1 Wireless
1 × 8.500 OMR
Earldom Microphone Collar Clip MC16L 2in1 Wireless
1 × 8.500 OMR 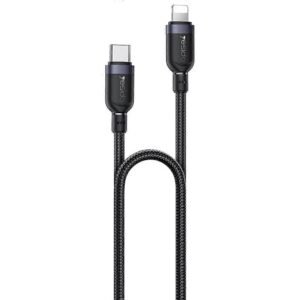 Yesido Data Cable CA189 Brided Usb C to Lightning 27w 1.2mtr
1 × 1.000 OMR
Yesido Data Cable CA189 Brided Usb C to Lightning 27w 1.2mtr
1 × 1.000 OMR  Cleo-TY Remote Control RC Car MJX16210
1 × 45.900 OMR
Cleo-TY Remote Control RC Car MJX16210
1 × 45.900 OMR  CLEO PLASTIC RECORDER
1 × 0.700 OMR
CLEO PLASTIC RECORDER
1 × 0.700 OMR  أقل سعر
 الخدمة والإصلاح
 أحدث
أحدث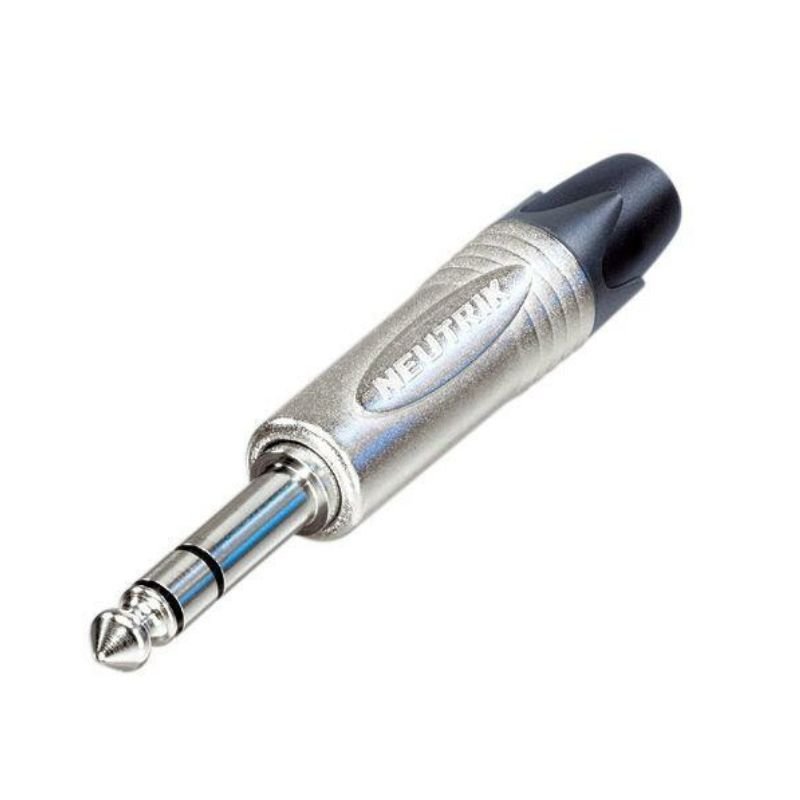


لا توجد مراجعات حتى الآن.