-
×
 Sony PS4 Minecraft Dungeons Hero Edition Game CD
1 × 13.800 OMR
Sony PS4 Minecraft Dungeons Hero Edition Game CD
1 × 13.800 OMR -
×
 كبل بيانات OTVO P4 USB (لمضيف ومقبض P4)
1 × 1.900 OMR
كبل بيانات OTVO P4 USB (لمضيف ومقبض P4)
1 × 1.900 OMR -
×
 قرص مدمج للعبة سوني PS4 لعبة الموت الغريبة، ميا
1 × 18.800 OMR
قرص مدمج للعبة سوني PS4 لعبة الموت الغريبة، ميا
1 × 18.800 OMR -
×
 قرص مدمج للعبة سوني PS4 mdievil
1 × 11.000 OMR
قرص مدمج للعبة سوني PS4 mdievil
1 × 11.000 OMR -
×
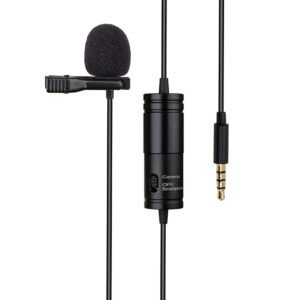 ATN1 Cable Condenser Lavalier Studio Clip
1 × 4.900 OMR
ATN1 Cable Condenser Lavalier Studio Clip
1 × 4.900 OMR -
×
 TM1 TNY LARGE DIAPHRAGM CONDENSER MICROPHONE WITH RECORDING PACKAGE
2 × 60.000 OMR
TM1 TNY LARGE DIAPHRAGM CONDENSER MICROPHONE WITH RECORDING PACKAGE
2 × 60.000 OMR -
×
 سي دي لعبة ام اكس في اس ايه تي في اول اوت لبلاستيشن 4
1 × 18.800 OMR
سي دي لعبة ام اكس في اس ايه تي في اول اوت لبلاستيشن 4
1 × 18.800 OMR -
×
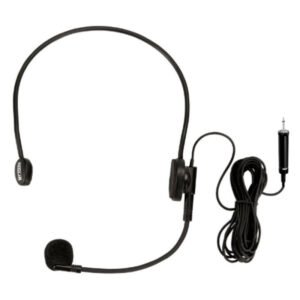 AHUJA HBM60CC Condenser Headband Microphone
1 × 13.000 OMR
AHUJA HBM60CC Condenser Headband Microphone
1 × 13.000 OMR
المجموع: 202.200 OMR
 أقل سعر
 الخدمة والإصلاح
 أحدث
أحدث

لا توجد مراجعات حتى الآن.